Pages

Thursday 13 July 2017

2017 catch-up...

Waiting to blow out my birthday candles wearing my favourite me-made dress!

So, I have been doing lots of  sewing recently, did Me-Made-May again, went to a fantastic sewing party, celebrated several family birthdays, did some pattern testing... and haven't blogged about any of it! Instagram has made it very easy to post makes straight away, but I still get great enjoyment out of reading other peoples blogs, with a bit more detail about the makes - in fact I added quite a few new blogs throughout May as I discovered new people in the sewing community. With this in mind I am going to try and post a bit more, but for now here are some of this years makes. This is going to be quite a long catch up post I feel....

The last thing I posted was my sparkly Drop top, which I actually made in March but posted in June. Straight after I made that top, I made another Mouse House Creations Julia Cardigan in a loose sweater knit fabric that I bought from the Girl Charlee stand at the Knitting and Stitching show in October.  It was not very seasonally appropriate when I made it and I wasn't sure I liked it when it was finished, but I did find myself wearing it quite a lot for Me-Made-May. I have also had quite a few compliments on it which is always nice!
 

The next make was more PJ's for Youngest daughter. The fabric was a gift from my sister-in-law, who had been to Hong Kong and Singapore with her husband just before Christmas, and found herself in the fabric district of one of them at some point. I made True Bias Hudson pants again (and spent a long time stripe matching when cutting out), but this time she wanted short sleeves, so I made a Kristen Kimono Tee by Maria Denmark:

Next up I cut out multiple projects to get me over the 'starting a project' hump. I cut out a Syrah Skirt from Lauren Dahl/Baste and Gather. This is a flared skirt with a yoga style waistband that I made in some lovely navy cotton/spandex jersey, from Girl Charlee UK online.  The pattern doesn't include pockets so I used a pocket piece form another pattern and just did simple side seam pockets. I also added some elastic to the waistband as I wasn't sure how secure it would be without!

The other garments I cut out were two tops for me and a denim pinafore dress for Eldest. If you can bear to do it, it is definitely worth cutting out more than one project at a time. You can dive straight in after finishing one project, or you can try something different if you hit a stumbling block with another project.

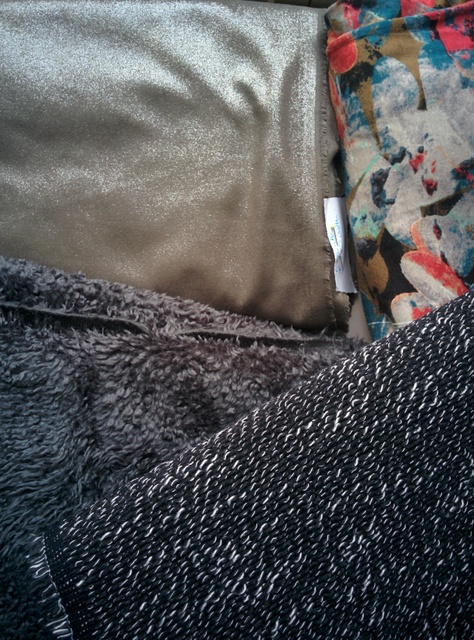
For the tops, I made my two usual styles, the Burda raglan top and the MyImage cowl neck top. I have made both of these quite a lot, and whilst I still like them I feel it is probably time to choose a new favourite!

A while ago I made a pinafore/dungaree dress for Eldest using the Cotton+Chalk Sunday Set pattern that came free with a sewing magazine last year (I think). She has wanted another for some time, but I wanted her to have some input in to the choice of fabric.  Whilst clicking around instagram one day I found what I thought would be the perfect fabric from @SewMeSomething. Eldest agreed (it is her favourite colour) so I placed an order and amazingly it arrived the next day! When I made the previous dungaree dress I had to draft a half circle skirt due to fabric limits.  I used the same pattern pieces for the skirt again and then had to try and remember the modifications I made to the cutting out and construction. Even with the notes I have made in my makers workbook it took me a while to work through what I had done! She was very pleased with it and has got lots of compliments from her friends.

Well I haven't even got half way through yet so I am am going to stop here and continue in another post! I hope you have all been making lovely things over the last few months.

Monday 5 June 2017

FO: Drapey Drop Top in sparkles

Earlier this year I noticed quite a few interesting draped tops around the internet and discovered the Drop Dress and Top by Made-it Patterns. I made this back in March.
 
I had a couple of fabrics that I wanted use, but it took me ages to choose! I ended up with this sparkly jersey that I bought on Goldhawk Road a couple of years ago. It has sparkles stuck to the surface of the fabric and also a silvery thread going through the yarn on the knit. At the time I bought it was planning to make a version of a dress in Crew Clothing, but I decided that it would be too Star Trek-y for me. 
The instructions for the top were easy to follow, and they included doing a type of neckline binding that I hadn't done for a long time. I was a bit concerned it would be too bulky, but it actually turned out really nicely.
Here are a few pictures of me wearing it - we went out for dinner and to the theatre the day after I made it and I sparkled my way through a local disco the day after!

If you follow me on Instagram you may have seen these pictures already.  Very excitingly, Made-it Patterns saw it and asked if they could repost!

I am looking forward to making it in a more light weight fabric for the summer, although with the sudden change in the weather I could easily be wearing this one today.

Sunday 30 April 2017

Me-Made-May 2017


It is that time of year again where we sewists celebrate our makes throughout the month of May. Me-Made-May was started Zoe of Sozowhatdoyouknow fame, eight years ago!

This time I am actually signing up before May starts ( although only just!).  If you click on the #MMMay17 button in the side bar, that will take you to Zoe's 'sign up post' on her blog. Here is my pledge:

 'I, Tamsin from Pimp my Curtains blog or Tamsinwp_pmc on Instagram, sign up as a participant of Me-Made-May '17. I will endeavour to wear at least one me-made item of clothing each day for the duration of May 2017. I am going to remove rtw clothing from my wardrobe excluding underwear, socks and sweaters.  I also want to sew as much as possible from my 'stash', which shouldn't be too hard as most recent purchases have had a loose plan'

Nothing ground breaking. I removed rtw from my wardrobe for my pledge last year, which seemed to work quite well. I shall enjoy the challenge of not reaching for jeans everyday (unless I make some new ones - which are on my list!) 

Have fun everyone!

Friday 21 April 2017

FO: Pj's for me

Some time ago, when visiting friends, I realised that the ancient rtw pyjamas I was wearing were actually not really worth wearing. Fortunately I realised this before exposing myself in an embarrassing way, but resolved to make myself some new pj's when I got home. 

I knew which fabrics I wanted to use, The plain slightly crinkley purple jersey I got from the first ever sewing meet up I went to back in 2012 and the stripey patterned fabric I got at a fabric swap meet-up in London last summer.  I had offered Eldest and Youngest pjs using these but neither seemed that bothered so I thought I would use it myself.

I used the true Bias Hudson Pants pattern for the trousers. I have made this several times already and didn't have any problems putting them together. The top was a pattern taken from a rtw top from H&M, which I have used a couple of times before. Fitting it on the fabric was a bit tricky as I didn't have a huge amount and I wanted the stripes to match as much as possible. I just about managed to to it as you can see here:
In order to fit the pieces, I felt I needed to slim down the sides of the top, but looking at this lay out it looks like that was unnecessary. I also used the stripey fabric as a contrast on the trousers.
After I had finished, I gave the pj set a final press and some how managed to slightly melt the waist band of the trousers, pretty much at centre front:
The melted waist band isn't noticeable when I wear them, but I'm guessing the fabric isn't the 100% cotton that I thought it was!

I wasn't sure about them straight after I had finished them, but now I really like them!


Friday 3 February 2017

FO: Static Dress - Sew Over It Heather Dress


So, the Sew Over It Heather dress has been all over the Internet recently. I believe that it was initially only available if you took a class at Sew Over It, but it was released as a pdf pattern in the autumn of 2016.
I have been looking at it off and on as it is very similar to a rtw dress that I bought from Cos a couple of years ago.

The Cos dress is still fine and I wear it alot, but it seems to shrink in length when I wash it and it seems considerably shorter than when I bought it. I had considered taking a pattern from the Cos dress, but the Heather dress is close enough  in style for the time being.

The fabric I wanted to use is a double knit and has been in my stash for a year, from MRosenberg/Stitch Fabrics at their Trumpington fabric sale. When I laid it out I realised that there is quite an obvious white stripe going vertically down the fabric, but also that the horizontal pattern had quite an obvious repeat.  I decided to cut on the single layer so that I could see the stripes and I could actually fit the pattern pieces on better than if I had tried to cut on the fold.

I think I spent the best part of a day trying to work out the stripes vs layout conundrum in the end. Portia from  Makery suggested just sewing a swatch together to see what it looked like unmatched:

I decided that it was good enough and started cutting!

For an easy sew, this took me a while. I made the size (10) I thought I would be comfortable with from the finished garment measurements, but I lengthen the torso by 5cm (2") just above where the pockets started. I copied @jenheartssewing on Instagram (you should look at her makes, she has some lovely stuff!) by doing this. I am not as tall as her, but have a reasonably long torso and didn't want the pockets starting just under my boobs!  When I tried it on, I found quite a lot of excess fabric in the waist area at the back


As you can see in the picture above I ended up taking the back seams in by about 1.5cms on each side. I also took about 3cm off each of the side seams at the hip, in several goes. This does mean that the back and front seams don't quite meet up on the side seam, but it is really not noticeable in this fabric. I found that the side seam where the pockets and panel seam meet is very bulky and I have had trouble getting the seam to lie flat when I am wearing it.

The pockets are fab and I can't keep my hands out of them! The construction of the pockets could seem a little tricky, but having done similar pockets in my Lisette Portfolio dress years ago and in Youngest's Sunki Tunic dresses, they were a piece of cake. It was much easier to put these in with a stretch fabric than in stiff denim!

I had a little trouble with the neckband this time... it was too loose the first time I put it on, so I trimmed it down by 10% and that seemed to work.

By the time I got to hemming it I was getting a little fed up with the whole thing, I just turned up 5 or 6 cms and hand stitched it - couldn't be bothered with wrestling with my machines! I left it hanging in one of my photo spots for at least a week before I felt I could wear it, and then wore it about four times in one week! I can safely say that I love it now!
with my newly made Bell Town Vest

This is the first time I have made a Sew Over It pattern.  The pdf was easy to put together and not too big, but I was quite surprised that there weren't any lengthen/shorten lines on the pattern. I am wondering how I can alter the pattern a bit to accommodate the alterations I made. I think I may start with cutting a smaller size and see how that goes, or may be take a sliver out of the centre front and back...
I could easily wear dresses like this all the time, even though I usually tend towards jeans and me-made tops. I have some more fabric that I picked up from MRosenberg at the Knitting and Stitching Show, which would be ideal, but I was thinking of trying the Made it Patterns Drop Dress with it too - decisions, decisions!


Saturday 28 January 2017

FO: Faux Fur Bell Town Vest

This fabric was part of the little haul that I bought at Trumpington Hall in early December. I had about 90cm of about 150cm width and I knew that I was going to make a vest/gilet type top out of it. I had planned to make a pattern from a vest top/gilet that I currently own, but I was reading the December Indie Pattern Review that Fiona from Diary of a Chain Stitcher puts together every month and there she mentioned a free vest top pattern from Straight Stitch Designs, the Bell Town Vest. I had a quick look and immediately downloaded and printed it out.

I followed various pieces of advice that I had read on the Internet about cutting faux fur from the reverse of the fabric to avoid spoiling the pile/fur and limiting a fluff explosion. I used my favourite way of way of marking fabric - using  sliver of soap instead of chalk. I can rarely get chalk to work consistently and saw this as a tip somewhere on Instagram and it is great!

 There is a slight stripe in the fur so I had to be careful to match that up

The vest is lined and I used a lot of pins to keep the slippery lining and the shifty fur together.
pocket sewn into wrong seam... how did I not notice!
The pattern doesn't include pockets, but I wanted them in mine. I used the same pattern piece for the in seam pockets in my Minoru jacket and estimated where I wanted to put them.  Unfortunately I sewed them beautifully to the lining of the jacket and somehow only realised this after I had sewn up the side seams of the faux fur.  I spent a long time unpicking.... perfectly matching thread that sinks into the fabric is great until you need to remove it!
I managed to get the pockets in the right place with out unpicking the whole seam, but the pocket openings are a fraction smaller that they should be.

So here is my little ensemble on Lola.

I had planned to get the tops, skirt and gilet sewn ready for Christmas day, but I got some kind of lurgy and spent most of the week before Christmas in bed. However, a very good friend turned 50 recently and so I figured that I could wear the ensemble for her celebrations:


Friday 20 January 2017

FO: Burdastyle skirt 11/2016 #102

I saw this skirt in the November issue of the BurdaStyle magazine and thought it was quite a nice variation on a simple skirt. My plan was to make it out of the shimmery beige fabric at top left in the picture below.
I didn't want to mess up the shimmery stuff, so very sensibly made a muslin using a greyish blue poly crepe fabric from the depths of my stash.  I tend to find that Burda patterns run big on me and the muslin showed this to be true again. I should probably just cut a smaller size. I took off the seam allowances on the side seams, put it back together and it fitted perfectly. The muslin also gave me a chance to construct the flounce. I couldn't get my head around the instructions and basted everything slightly wrong a couple of times.
Having got the muslin fitting nicely, I tackled the shimmery fabric.  I can't decide if it is a stretch woven or stable knit and it is really had to tell from either side of the fabric. It feels like faux suede and drapes beautifully, but was surprisingly hard sew - it was really hard to pin and it felt a bit 'sticky' going through the sewing machine. I have since bought some wonder clips to try if I come across the like again. Despite how tricky it was to handle, the invisible zip went in perfectly
Despite trying on at various stages of construction, the finished item has turned out to be a bit big in the waist - I think it stretched out with being handled. It would be a pretty easy fix if I wanted to sort it out. I am unlikely to wear it with a tucked in top, so may leave it.


Having had a very specific vision in my head of the finished skirt, I am not sure that this skirt lives up to that vision and due to the shimmery aspect, I am not sure that it is very flattering. I have worn it, it was ok. I am wondering, looking at various photos, whether it needs to be shorter, in which case I will definitely sort out the fit at the waist as that will hoick it up a bit!


Thursday 19 January 2017

FO: Jersey tops for me...

At the beginning of December I went to the Stitch Fabric/MRosenberg fabric sale at Trumpington Village Hall. I wasn't sure that I would buy anything - goodness know I don't need more fabric! However I came away with a number of fabrics that all go together and a plan forming in my head.

I washed sample pieces of each fabric to see how they would react. There were no adverse effects so I washed everything on a normal wash and line dried them.  The jersey I thought would make a nice wrap dress or top, but it had quite a few flaws in it (It had been in the remnant pile and I knew the flaws were there)
Once I laid it out I decided to cut out a couple of tops rather than a dress, and opted for my trusty Burdastyle Raglan top
 
This top has gathering on the raglan sleeves, which looks lovely, but I forget how fiddly this is every.single.time! The neckband was really tricky this time - I normally top stitch the seam allowance of the neckband to get it to stay flat, but the fabric did not like that, so after a couple of attempts I gave up. I finished the sleeves and the bottom hem with bands, but I think I may take off the hem band as the top is very long.

I also made a MyImage magazine cowl neck top that I have made a few times before,


For some reason this top was a much easier sew than the other one, and possibly because of that I prefer this one out of the two!


I am hoping that these two tops will be quite versatile - there are so many colours in them that they will co-ordinate with a number of things already in my wardrobe.