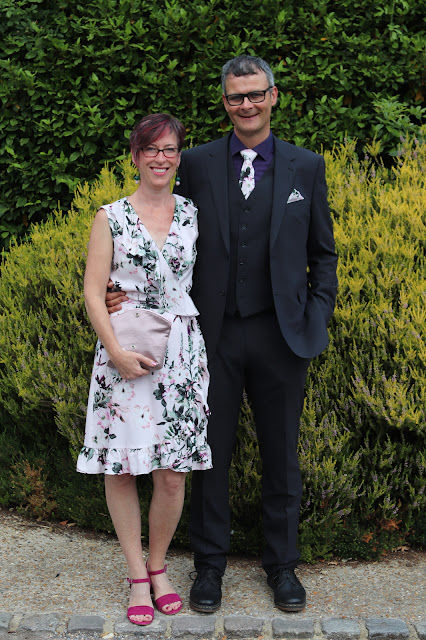
I posted a little while ago about the very
special wedding sewing that I did earlier in the summer and this is the story of the dress that I wore to that wedding.

I was looking for a wrap style dress possibly with ruffles and I found the exact dress in the
Style Arc Giselle. However, when I looked at the line drawing I decided that it looked quite simple and that I could recreate it from the bodice block that I have drawn up in my pattern cutting class.
This obviously wasn't as simple as I thought it would be. I converted my bodice and skirt blocks into a wrap versions, drafted the circular ruffle, made up a toile and it was a disaster! The bones of it were there, but there was
waaay too much fabric in the bodice and I couldn't work out why. I tried moving darts and taking it in, but it was turning into a bit of a dogs dinner.
For some reason I decided to check my measurements against the ones I had taken for my block 5 years ago and whilst I am roughly the same weight and size, my measurements were noticeably different, which accounted for the excess fabric in the toile. I decided to redraft my bodice block, so that I could then redraft the wrap dress. The redraft worked well and I made a second toile but it still didn't fit right.
At this point I was beginning to run out of time, so I gave in and bought the PDF of the Giselle. I compared the Giselle pattern pieces to mine and could see immediately what I had done wrong on the second toile - I had forgotten to true up the waist when I had moved a dart. Unfortunately I didn't take any photos of any of this.
The fabric I used is viscose and it is lovely and floaty. I got the fabric from Geoff Rosenberg of Stitch Fabrics, off his remnant table at one of his Trumpington Village hall sales. I made a size 10 using the Style Arc pattern and it fitted really well. The instructions are pretty minimal, but having used Burdastyle magazine patterns in the past it was quite straight forward! I did struggle getting the waist tie on to the the dress neatly, but I think I mis-read something earlier in the construction. I manged to bodge it pretty well and you can't see that bit of the dress when it is being worn.When I was trying the dress on just before it was finished, I realised that the skirt was slightly see-through at the back, such that you could see the colour and shape of my underwear. I very quickly cut a lining out of some silk and just lined the back of the skirt by hand stitching it to the waistline and down the side seams.
I have a few pictures of the construction of the actual dress:
Here I was finishing the edges of the ruffle/flounce. I tried using a rolled hem foot on a scrap of fabric but didn't get on very well, so I overlocked the edges, folded over the edge and sewed a very narrow hem
There was a lot of gathering on the ruffle for the skirt portion of the dress
Turning rouleau tubes for the waist ties
Checking out the finished dress
back view
And finally, a more relaxed vibe at Camp Workroom Social, waiting for the fashion show:
So in the end a very successful make. I was a little disappointed that I hadn't persevered with the drafting when I realised how close I had got with my version, but the finished dress and how I felt wearing it, wiped away that disappointment!


